When I set up my Personal Compute Cluster composed of EGLOBAL S200 computers (affiliate link), one of the first issues I noticed was that the CPUs would overheat when all 12 threads on the CPU (2 threads per core) were being ran at 100% load. This disappointed me about the S200 computer as it was otherwise perfect for my use case. So I set up to find a way to improve the situation.
The first step is to be able to measure the CPU temperature by installing lm-sensors, which is a utility that allows you to read the CPU temperature. To install it on all machines in the cluster:
parallm-ssh -i -h ~/cluster/all.txt -l root "apt-get install lm-sensors"
Then you need to log into each machine in the cluster one by one and installation the sensor software by running:
sudo sensors-detect
The software will try to detect the various sensors that the computer has. Accept all the default options as the software presents them to you, even if there is a warning associated with it. Once fully set up on each machine, you can get the CPU temperature on all machines in the cluster with:
parallel-ssh -i -h ~/cluster/all.txt -l michael "sensors"
Now if you look at the CPU temperature when the cluster its under load, especially if the CPU is at 100% load, you will see that with the OEM cooling, the CPU sits at about 90 degrees Celsius, which is uncomfortably close to the max temperature of 100 degrees. In fact, when under load my cluster frequently computers frequently hit 100 degrees, which causes the CPU to reduce its frequency in order to avoid damage. Furthermore, the OEM CPU cooler fan is pretty noisy when under load too.
Selecting a New CPU Cooler
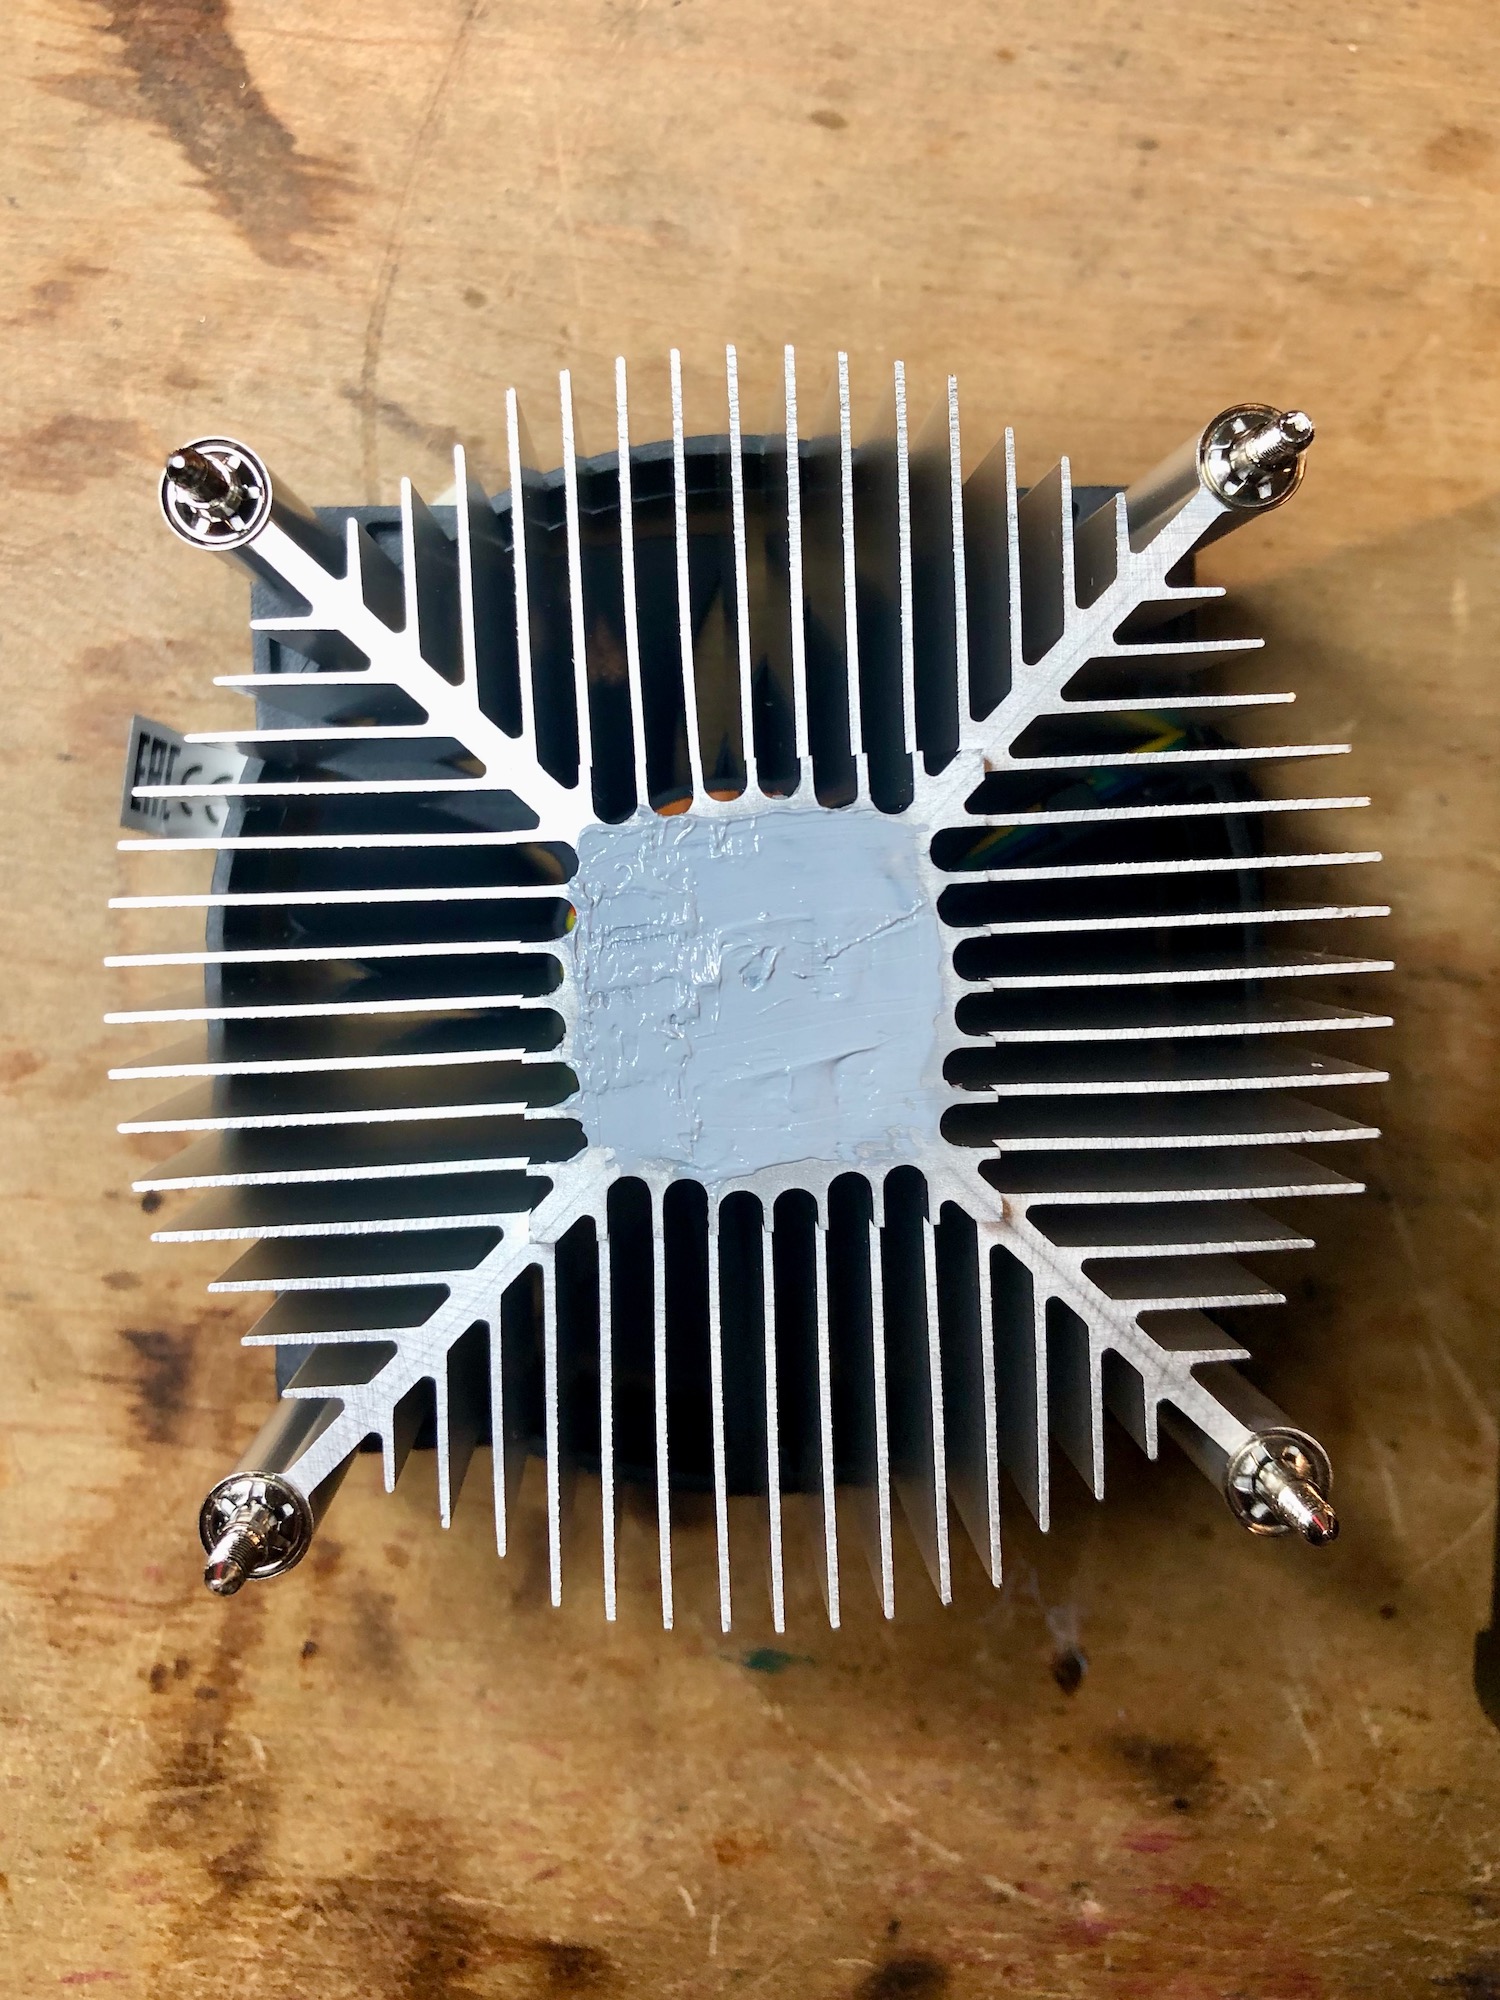
After doing some research, I identified the Thermaltake 7-bladed 92mm CPU cooler (affiliate link) as a potential replacement. It has the same footprint as the OEM cooler, and a higher thermal dissipation rating at 95W. And at about $13 per unit, it’s a cheap fix too. So I tried it out.
The TL;DR answer is that this cooler ended up keeping the S200’s CPU at least 15 to 20 degrees cooler than the OEM cooler, allowing me to run the CPU at 100% and the temperature holding steady at about 65 to 70 degrees Celsius while the other unmodified computers in my cluster sat at 85 to 90 degrees under the same load. I consider this a win.
Installing a New CPU Cooler
In oder to update the CPU cooler on all computers in my cluster, I needed to order the following supplies (affiliate links):
| Item Name | Quantity | Price Each |
|---|---|---|
| Thermaltake 7-bladed 92mm CPU Cooling Fan | 4 | $12.97 |
| Thermal Grizzly Kryonaut Thermal Grease Paste | 1 | $27.99 |
| M2.5 Black Nylon Standoff Kit | 2 | $7.95 |
The standoffs are needed because the CPU cooler is taller than the original cooler, and so the standoffs will be used to reattached the computer case cover. You need two fo the standoff parts kit because one doesn’t have enough pieces for all four nodes in the cluster. If you have fewer S200 computers to change out the CPU cooler on, then you might be able to do with only one kit. Also, the thermal grease selected above is a large tube. I selected a large because I have four nodes to replace the cooler on.
The tools you will need for this work are on T7 tori screwdriver, a phillips head screwdriver, and something to wipe thermal grease with (I used paper towel and had alcohol handy for cleaning).
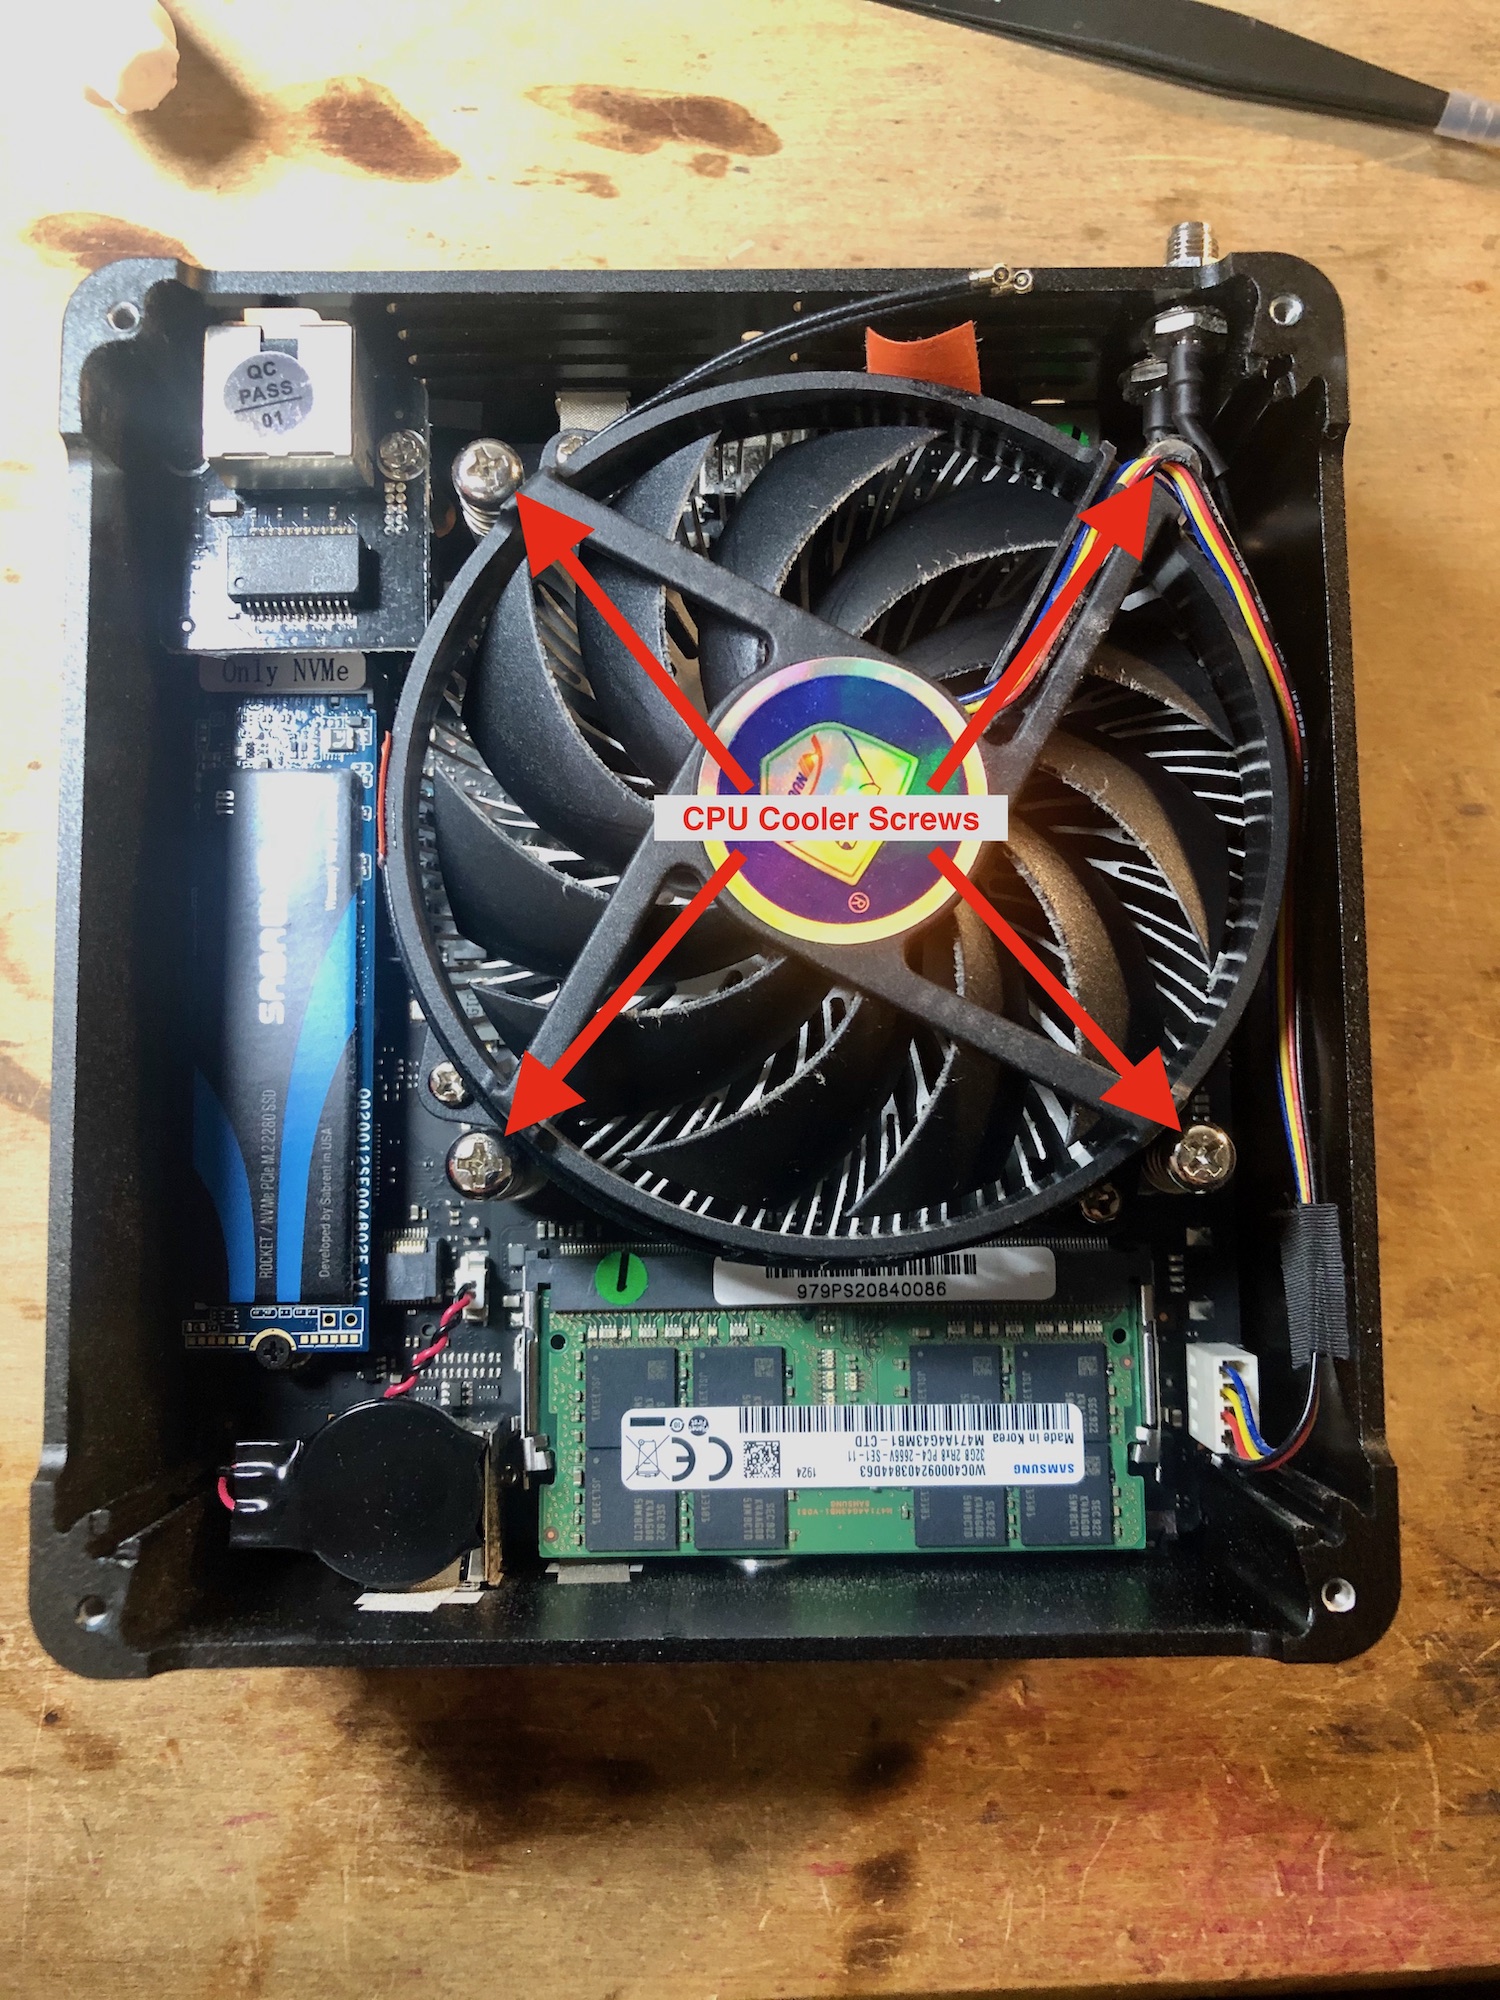
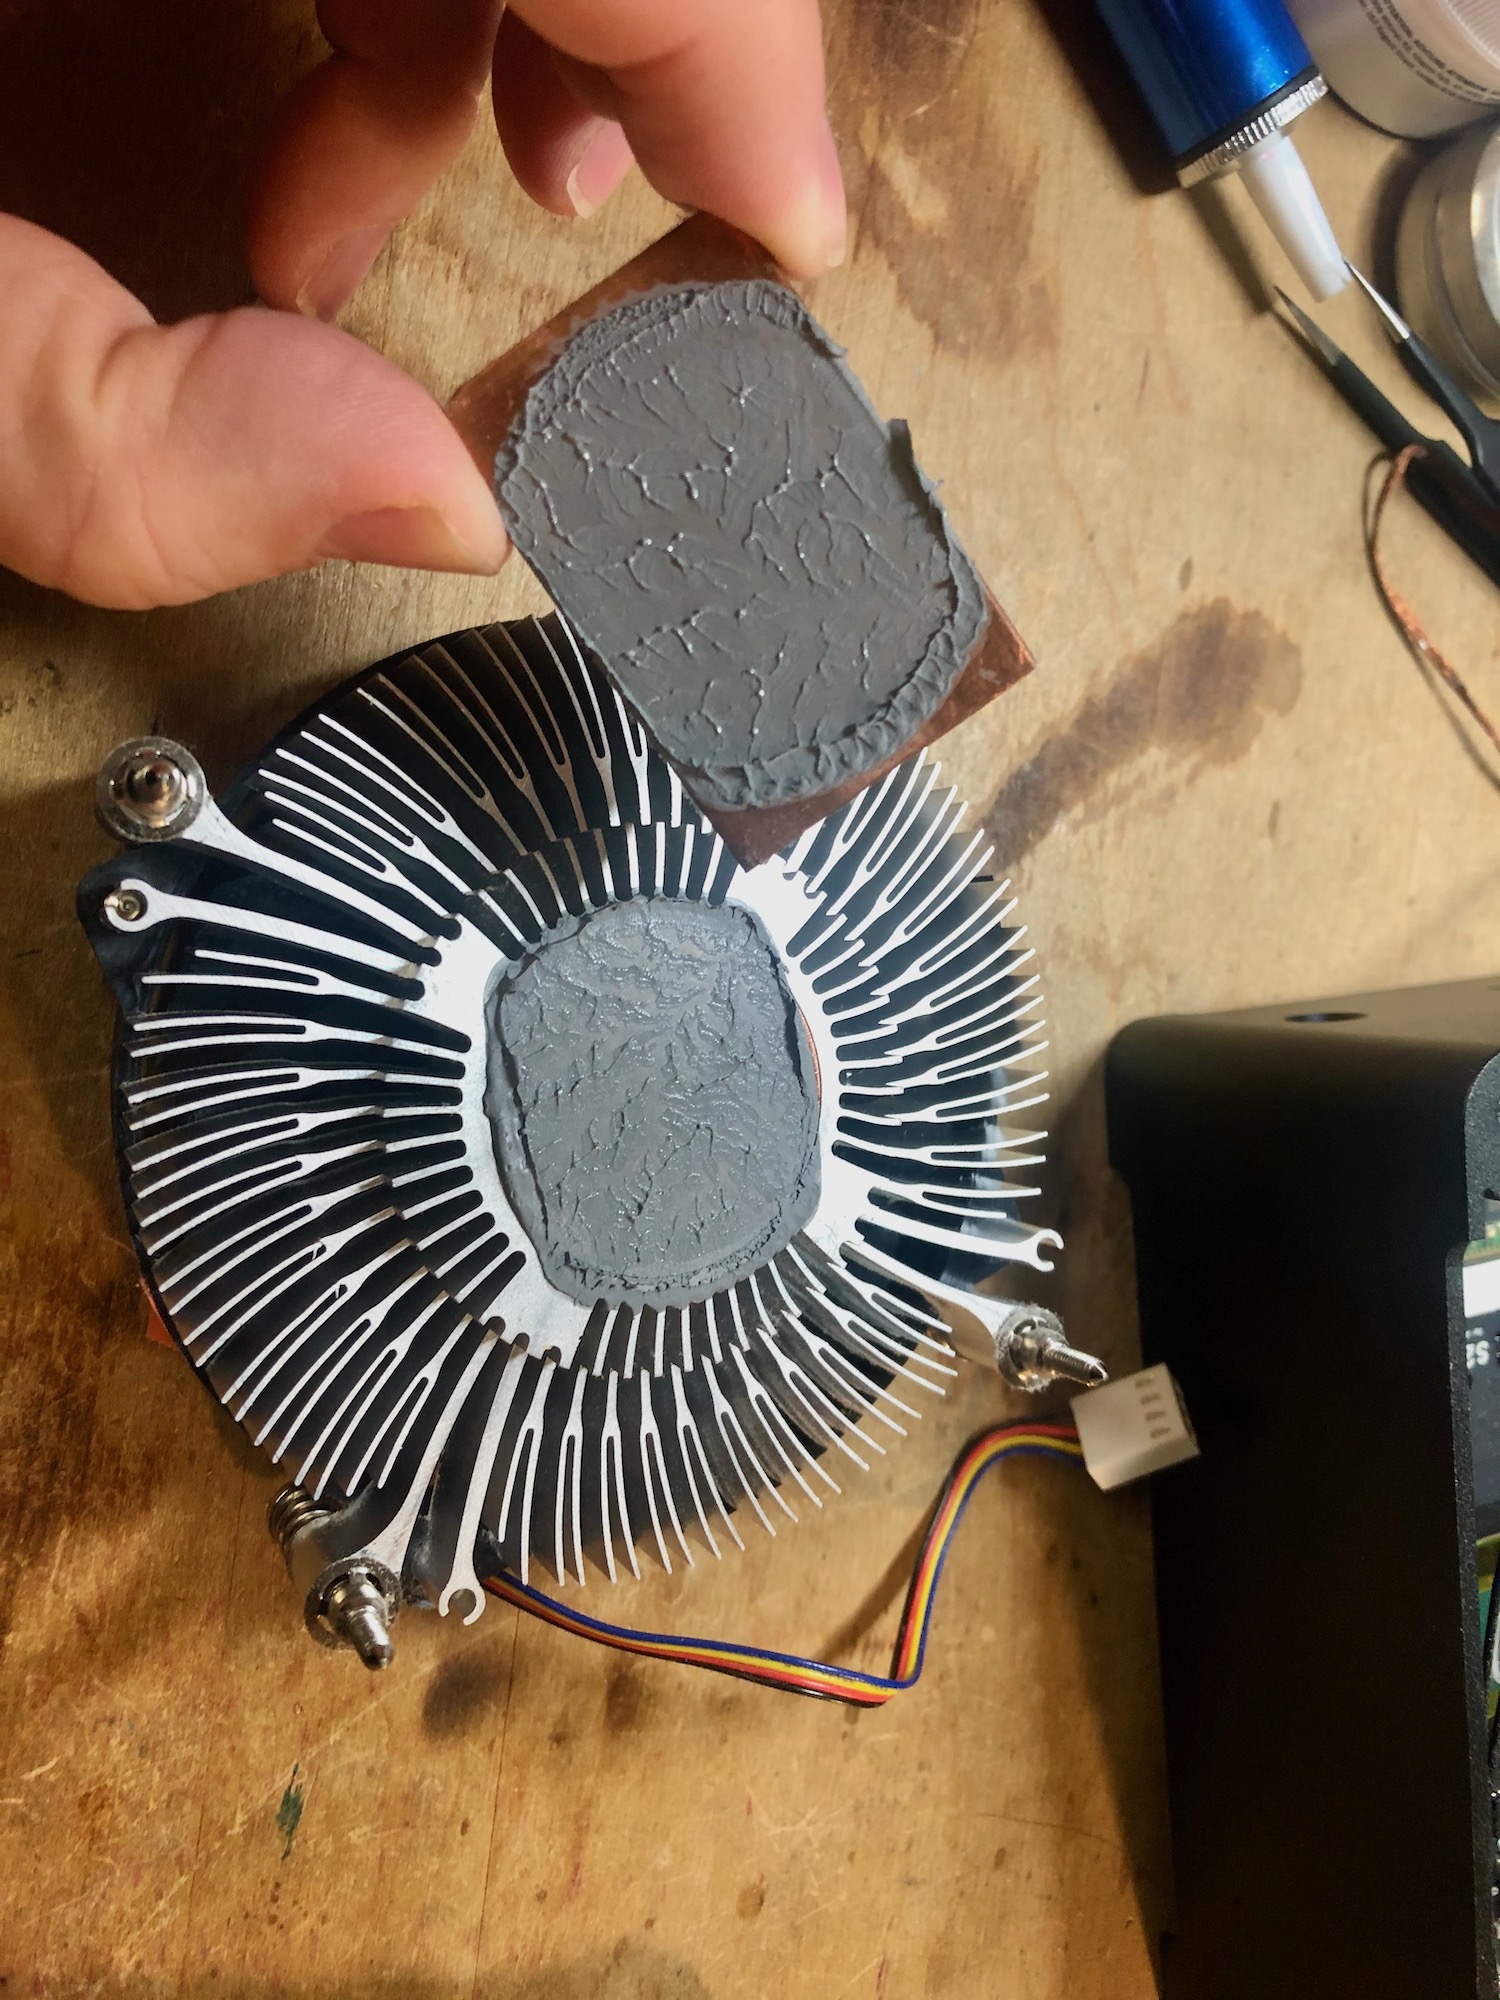
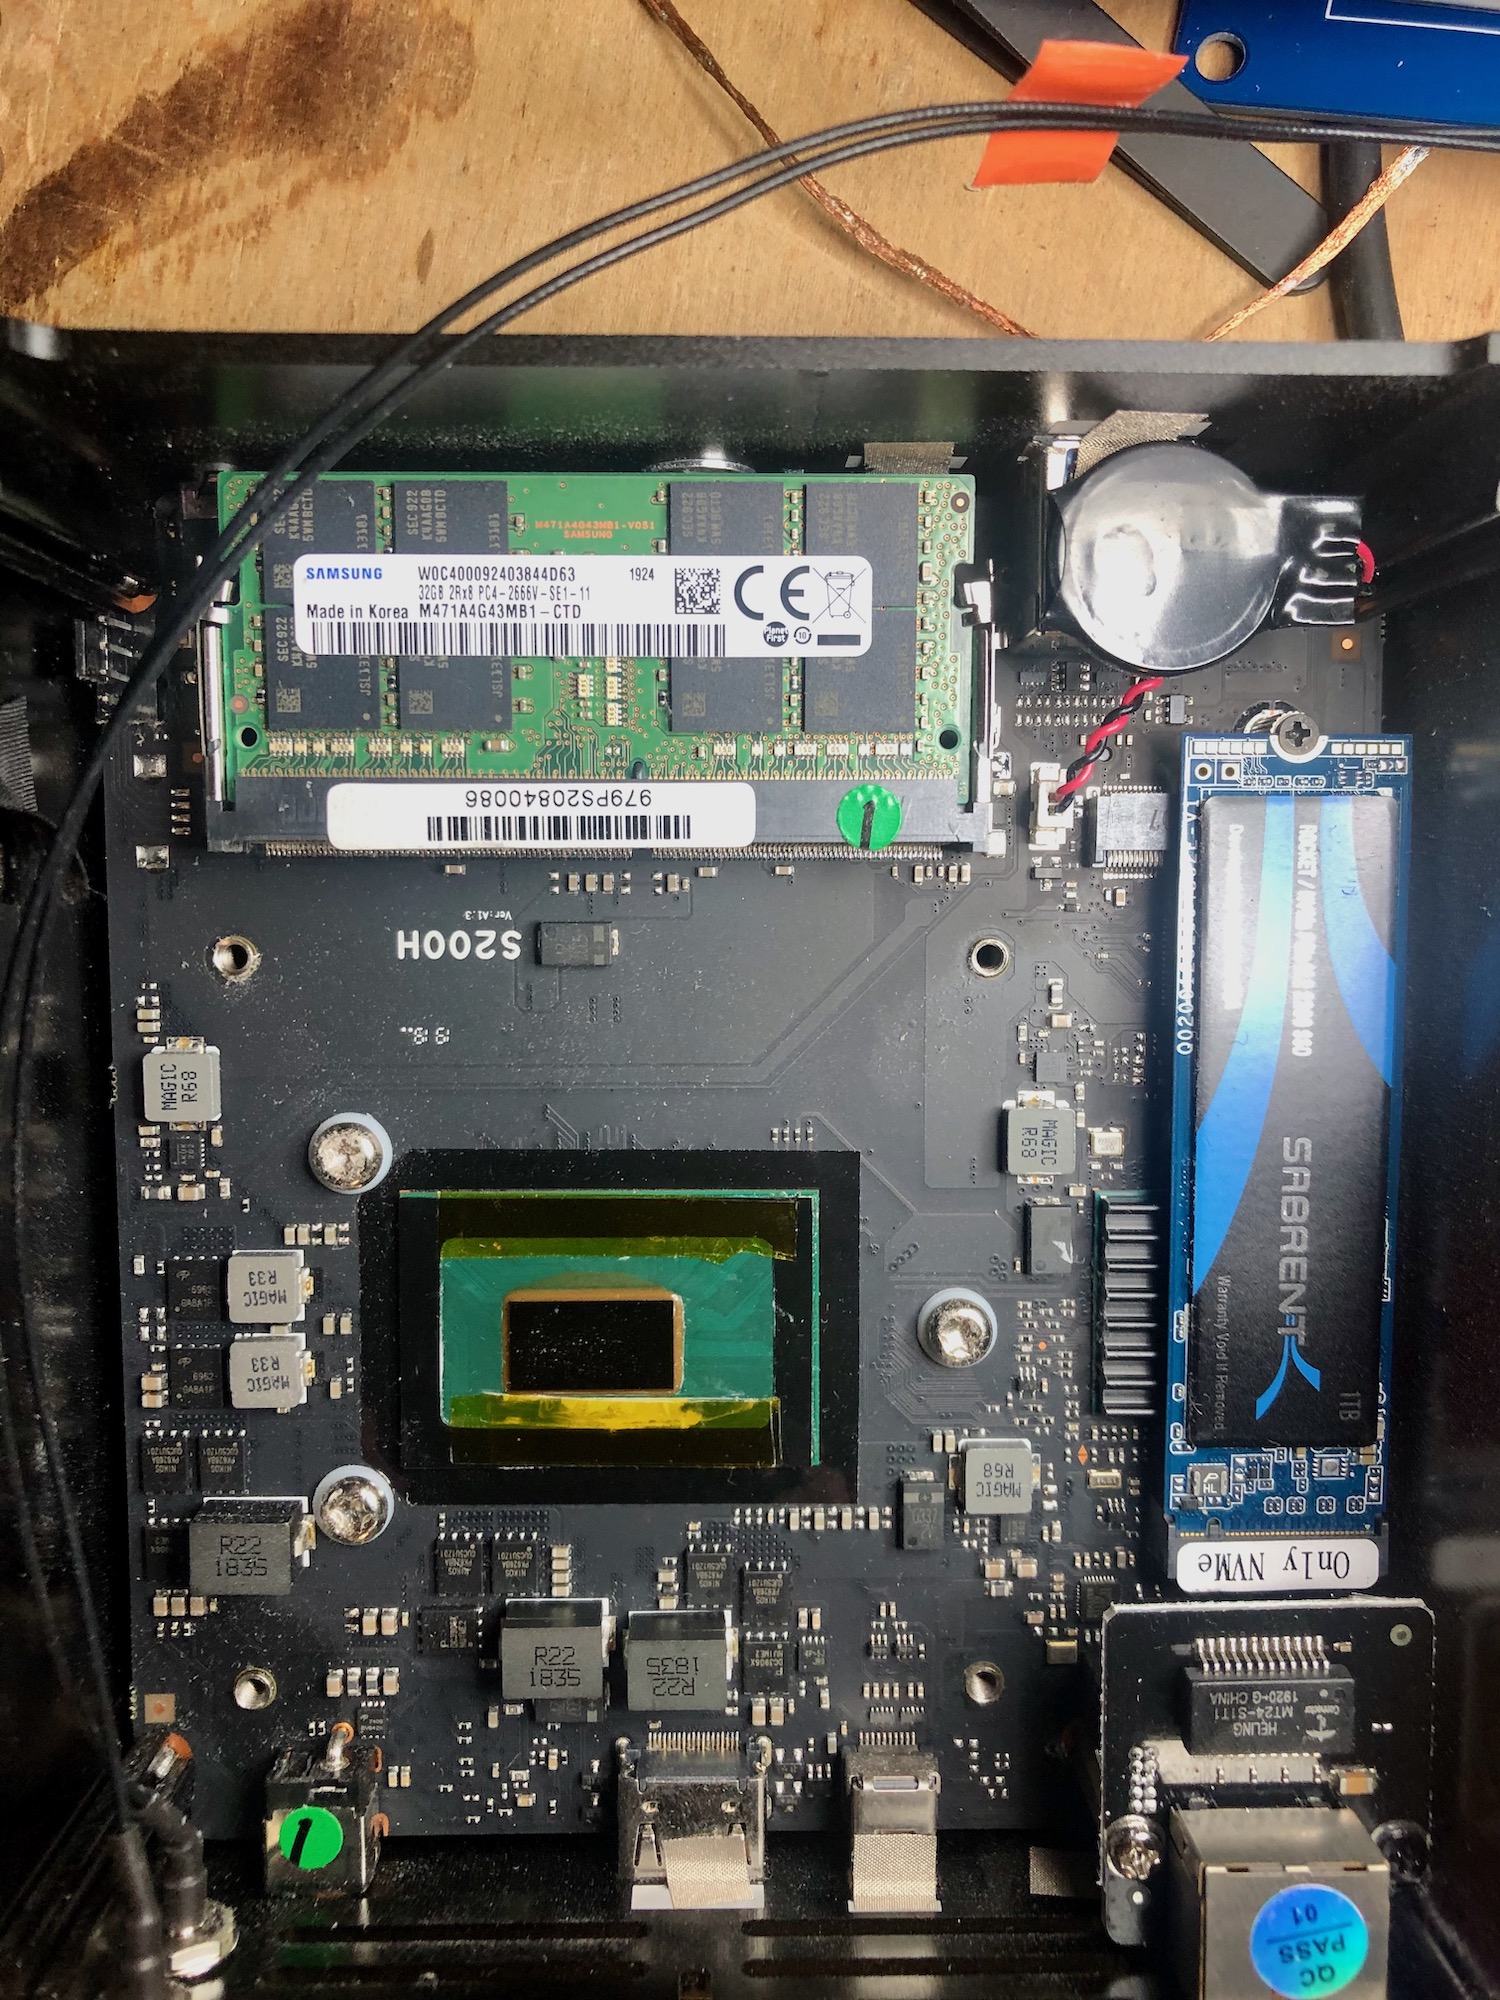
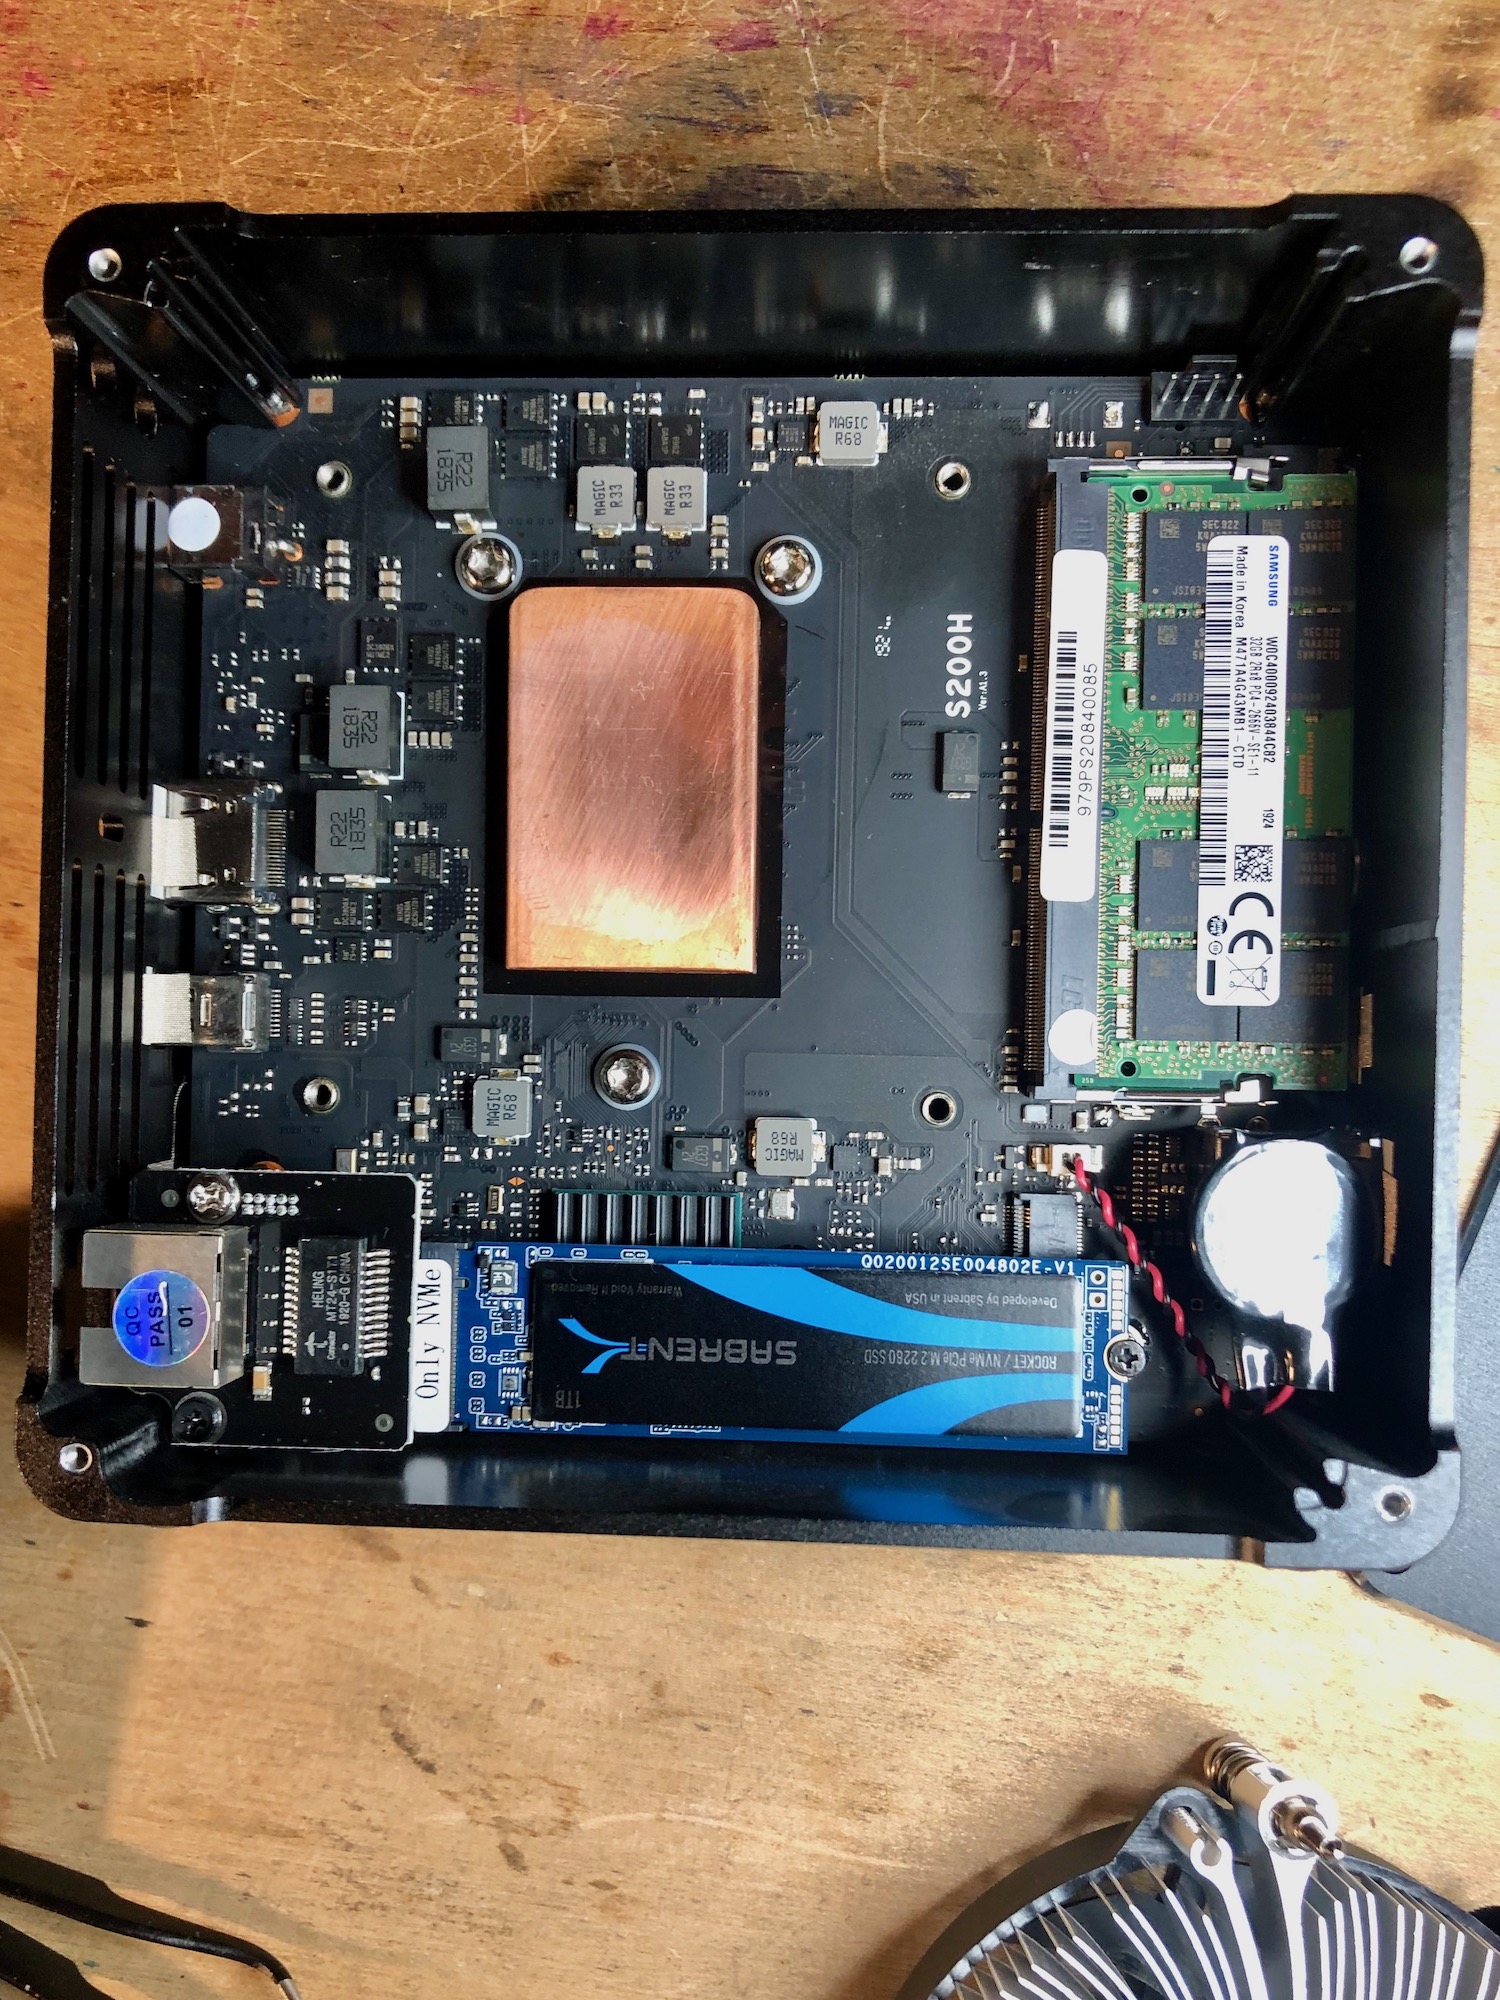
The first step in installing the new cooler is to first remove the OEM CPU cooler originally installed in the S200 computer. To do that, power down and detach the computer’s power and networking cables, then remove the computer’s top case cover and loosen the CPU cooler screws. Once the screws completely disengage with the motherboard, go ahead and gently pull it off the CPU. You will notice that on the bottom side of the CPU cooler there is a solid copper block that sat between the CPU cooler and the CPU. This is a heat conductive spacer. You will note that the components immediately around the CPU are tall. The spacer raises the surface level that the CPU cooler needs to attach to so it doesn’t interfere with the components immediately around the CPU. Do not loose this copper spacer, as we will be using it when installing the new CPU cooler.
Once the original CPU cooler has been removed, detach its electrical connector from the motherboard, and set it aside. Clean both the CPU and the copper spacer of any residual thermal grease. Alcohol wipes work great for this purpose. I also cleaned the original CPU cooler so that I could put it into storage without making a mess.

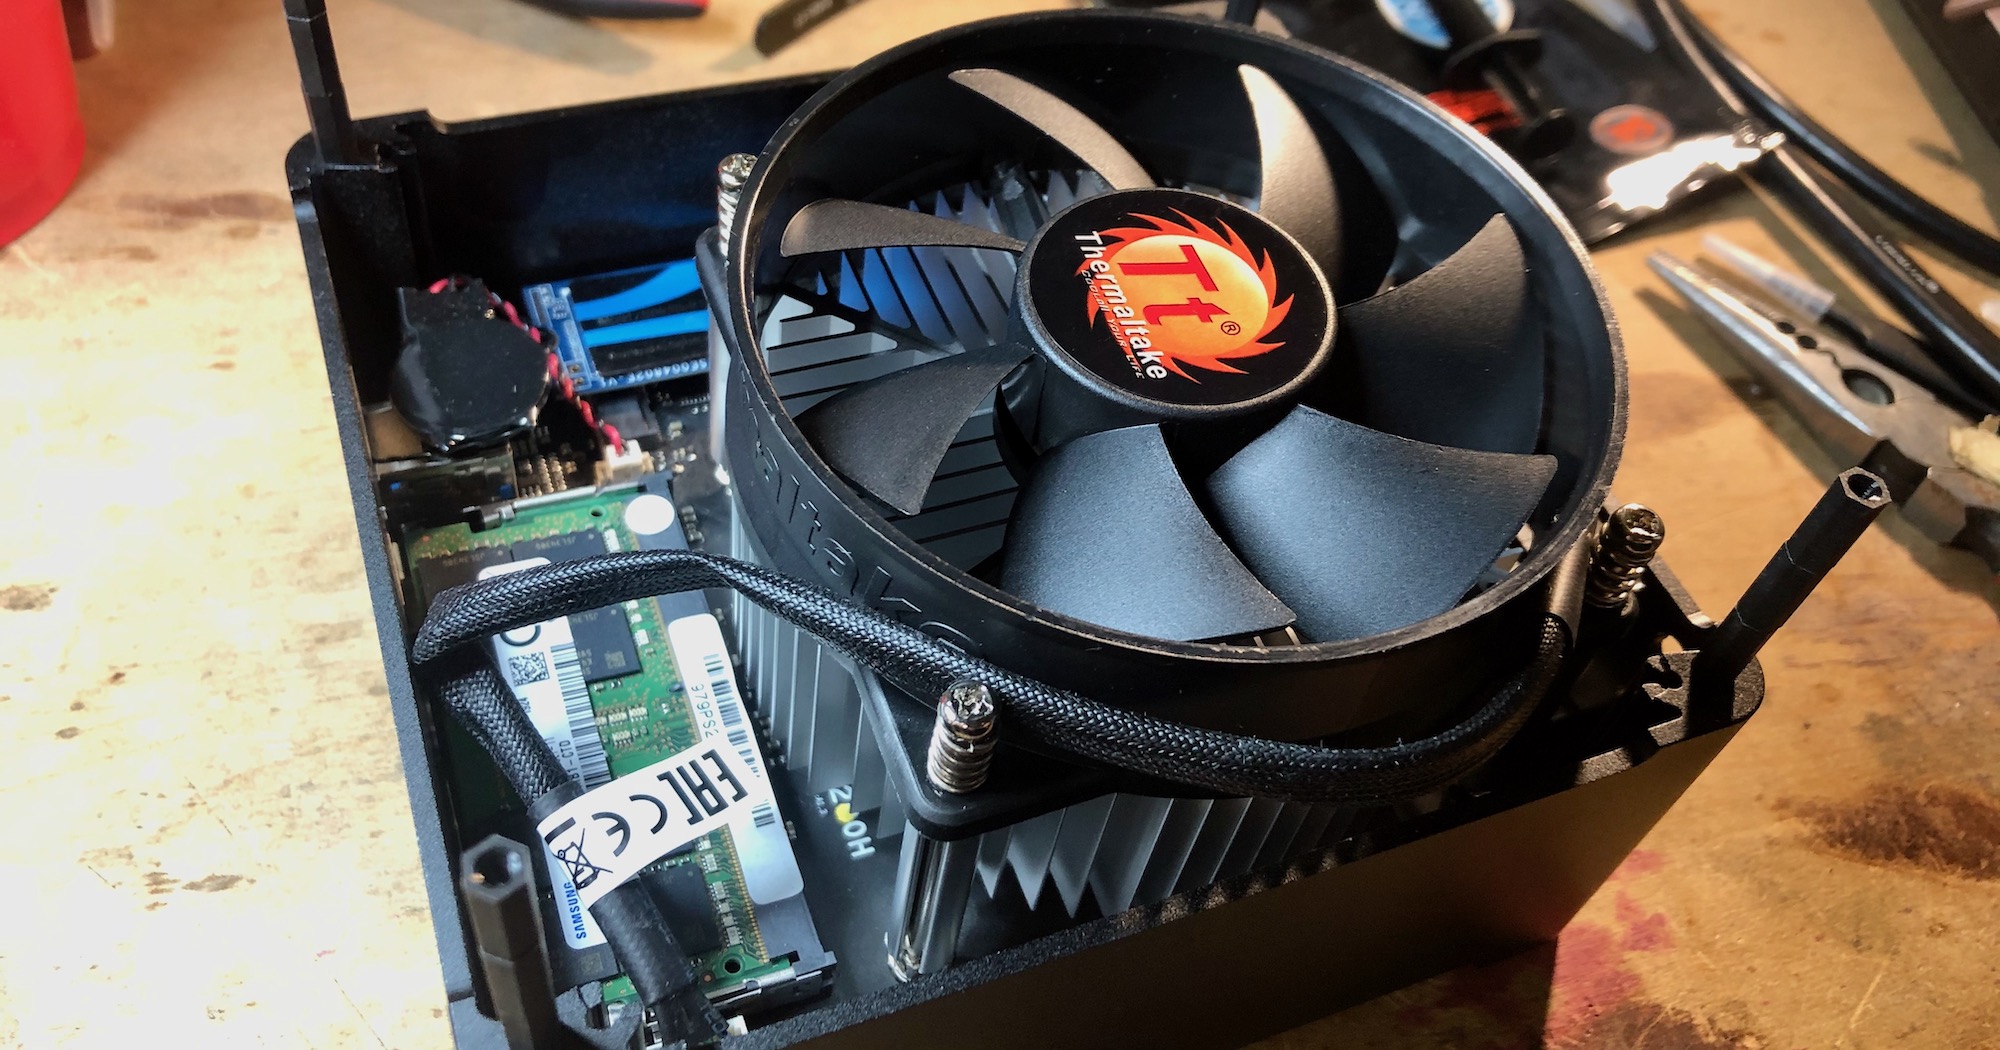
The next step is to install the new Thermaltake CPU cooler. The good news here is the Thermaltake cooler will fit onto the S200’s motherboard without us having to change out the motherboard backing plates. The bad news is that this cooler is too tall to completely fit within the closed S200 case. We can still attach the case’s top via some PCB standoffs, but the case will still be essentially open. This is OK for me as I do not the aesthetics of an closed case and my homelab is such that is OK for me to have partially opened computers in it. Your milage might vary.
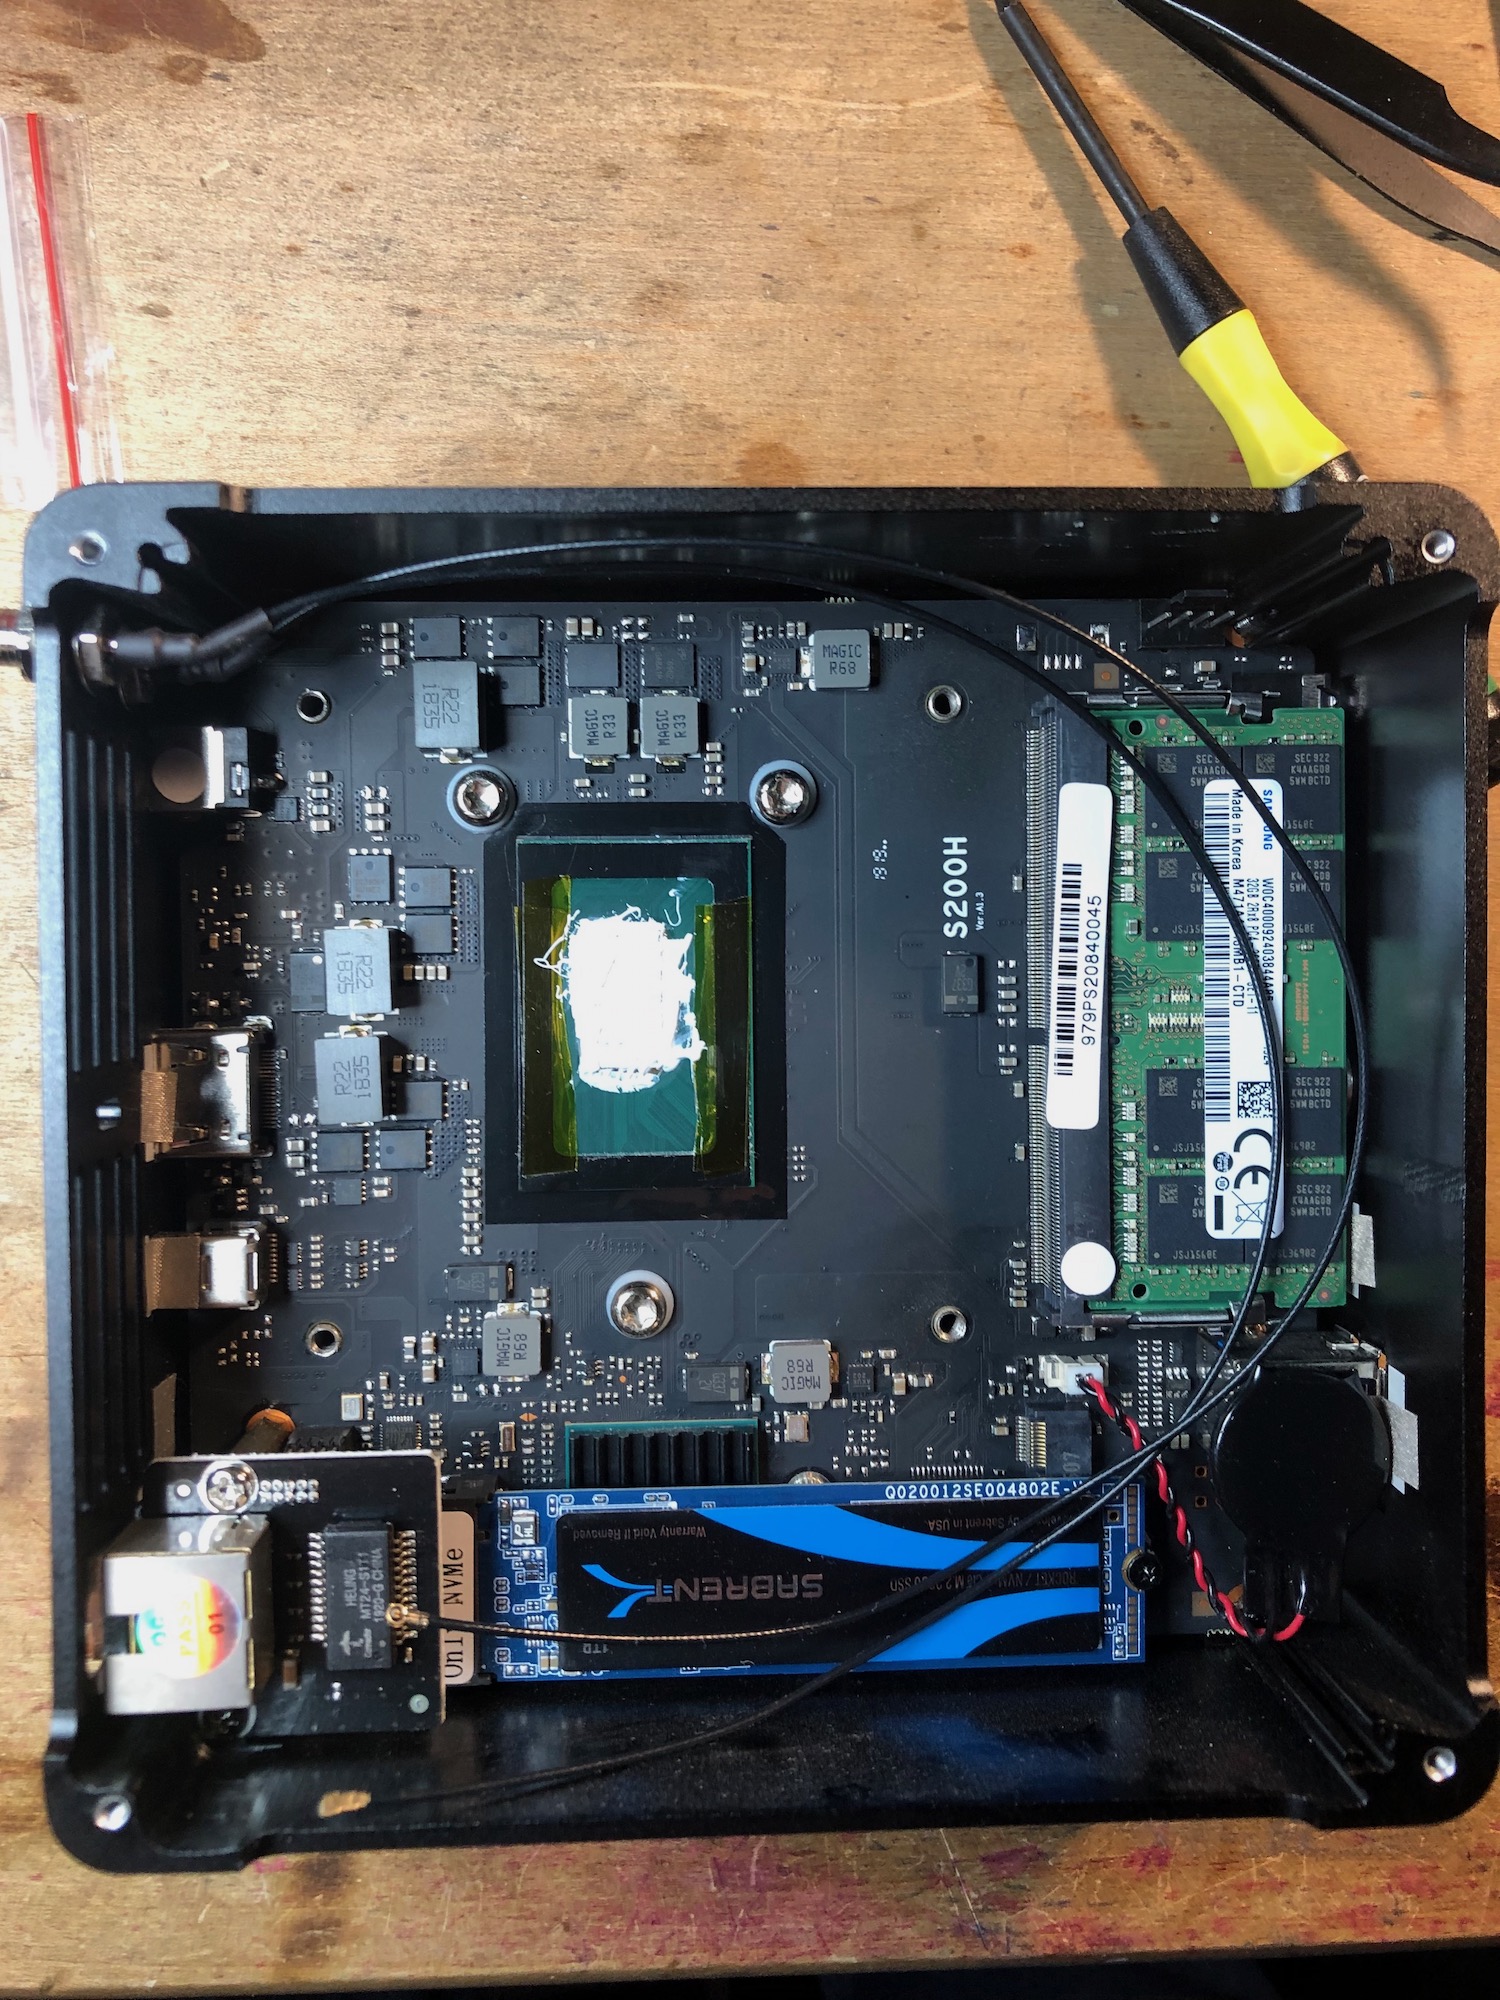
To attach the new CPU cooler, the first step is to put thermal grease on both the CPU and the bottom side of the new cooler. Normally you only dow one or the other, but since the S200 has the copy spacer in between the CPU and the cooler, we do need to put grease on both. Putting thermal grease down is an art form, and I am very much not an artist. But I did try to put a thin layer of the thermal grease across the top of the shiny part of the CPU and the bottom part of the CPU cooler. Because of the copper spacer, the S200 is quite forgiving of lot placing the thermal grease precisely.
After placing the grease, the next step is to replace the copper spacer. Note that one side of the copper spacer is smooth and the other side has small ridges. The side with the ridges is the side that faces downward towards the motherboard. When you place it, make sure it seats onto the motherboard and not the small PCB that surrounds the CPU. The ridges are designed to fit snugly around that PCB. Also, the rounded corners of the copper spacer should face the two screws that are closest to the CPU.
Now place the CPU cooler over the CPU cooler connection point in the motherboard. Before screwing anything down, consider the routing for the CPU cooler power cable to the 4-pin connector on the motherboard. Orient the CPU cooler such that you are happy with the cooler’s power cable routing. Now start screwing the cooler’s screws into the connection points. Turn each screw only a couple turns at a time so that you bring the cooler’s bottom side down evenly towards the copper spacer. Stop turning a screw the moment it stops turning itself. Do not force it any further!
Now we reattach the cooler’s power cable to the 4-pin connector on the motherboard. If you didn’t pay attention to the orientation of the connector when removing the original CPU cooler, the black wire from the cooler connects to the pin furthest away from the cooler.
The final set is to reattach the case cover. You will have probably noticed by now that the new CPU cooler is too tall to close the case. However, we can still reattach the cover if was use some M2.5 standoffs. The standoffs I list above are individually too short to raise the connection point for the cover. However, three of them connected to each other will do the job nicely. So, make four longer standoffs by connecting three of the smaller ones together for each of the four we need, then attach the constructed standoff to the four screw holes in the case. Then, attach the case cover to the top of the standoffs.

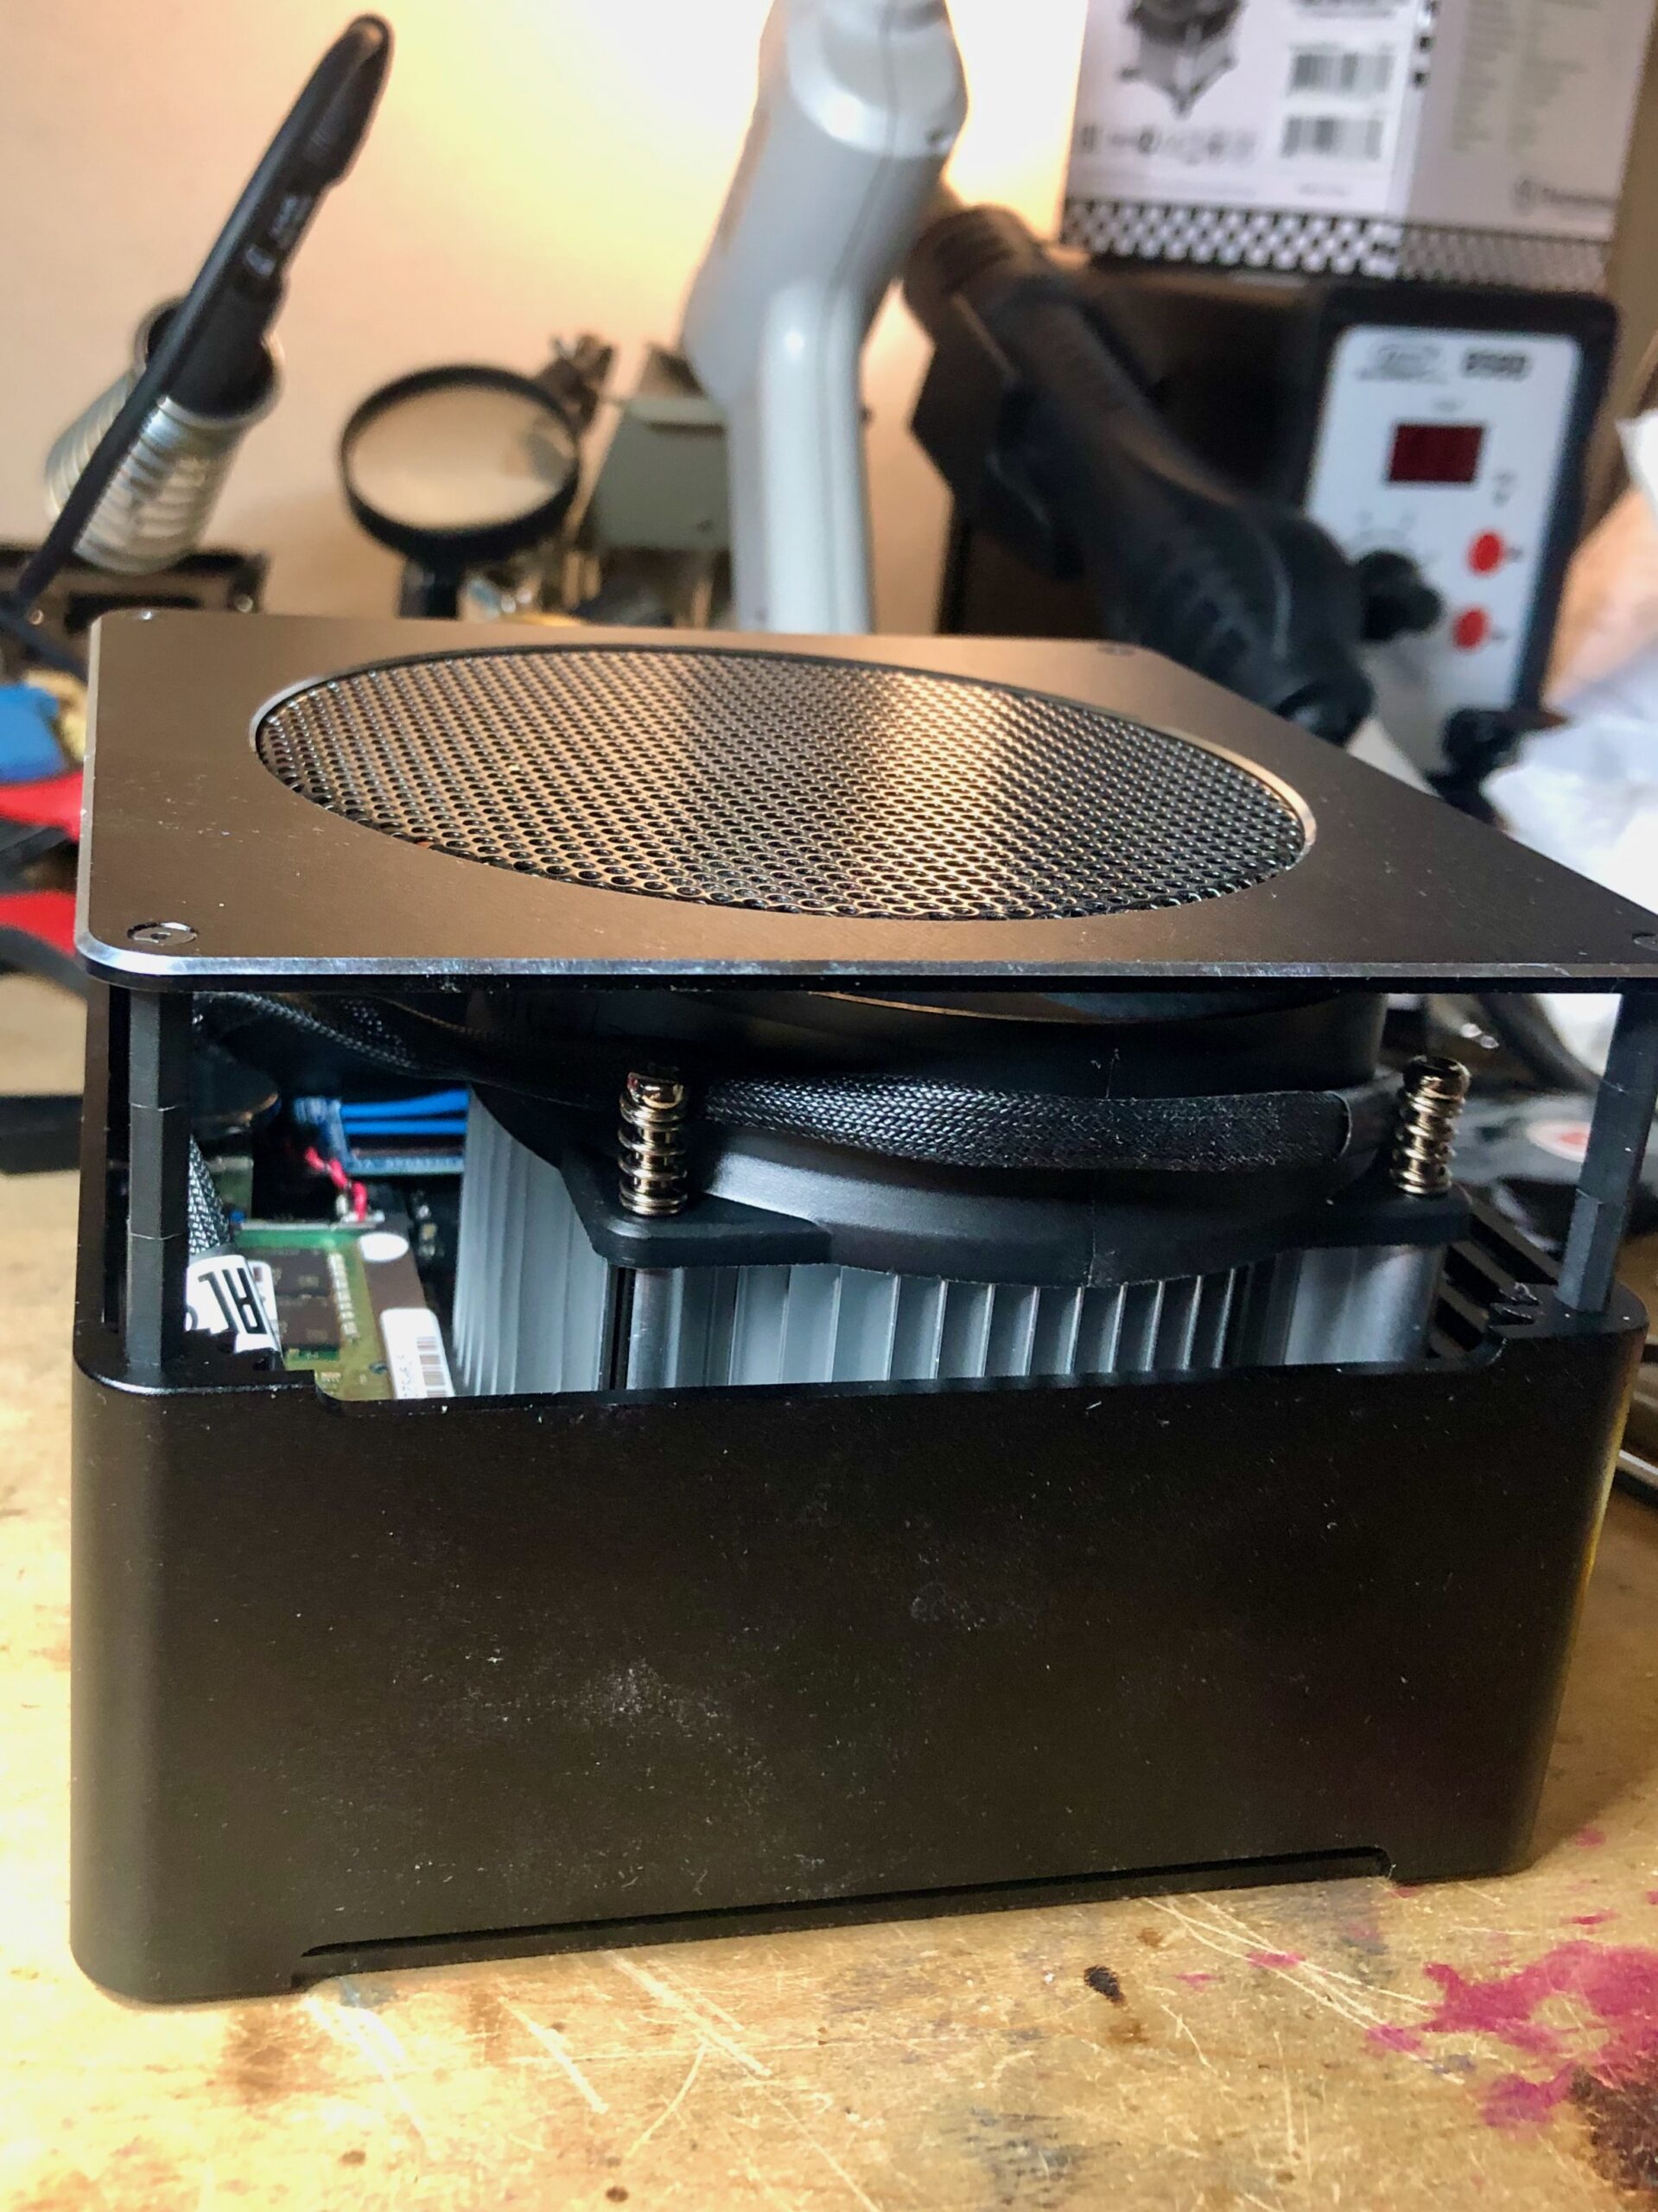
And that’s it. The S200 computer has been updated with a better CPU cooler. Repeat this process for each of the nodes in the cluster, then reassemble the cluster and enjoy your cooler running nodes.
One thought on “Improving the cooling of the EGLOBAL S200 computer”